SOME QUICK IDEAS AND HELPFUL HINTS FOR YOU AND YOUR KITCHEN
My life is busy… I’ve got kids going in every direction, a lively business, and I want to maintain a little work-life balance. Because of all the moving parts, there are a lot of days that I just don’t have the time or energy to cook recipes that have 30 steps. I’m here to share with you these tips on how to make deliciously simple meals with ease… Easy & Quick Cooking Tips are here to help you in the kitchen.
Below you will find an ever expanding list of cooking tips. These can be about different methods, styles, foods or whatever. If you have some tips you would like to add in, please do so in the comments!
If you have any questions, add them to the comments as well. I’ll be sure to get them answered!
There are a lot of questions about braising. Here are some of them and some quick cooking tips!
Q: What can you braise?
A: Braising is for meats, veggies and yes… fruits. Just about any meat can be braised (with adjusted cook times). There are many veggies that take on exceptional flavor through braising. Some fruits can be braised as well, like pairs, apples and bananas.
Q: Can I braise on the stovetop?
A: Absolutely. A stovetop is the perfect place to quickly braise vegetables and quick cooking proteins like fish. For longer braises, such as pork shoulder, ribs or a chuck roast I would use the oven. With long braises, many stovetops tend to put out too much heat even on the low setting which could result in burning or overcooking. In the oven, the heat surrounds the cooking vessel and allows for a more even cooking experience.
Q: Can I braise in any dish?
A: It all depends. I’m a big fan of heavy bottom pans or cast iron. These allow the heat to be dispersed more evenly and have less temperature fluctuations. At our professional kitchen, we braised in braising pans, roasting pans, stock pots and more. At home, I’ll braise in a pyrex baking dish (this is not for searing, just for braising!) or in my pressure cooker. The most important part to selecting the dish is making sure that you can get a good, tight seal with the cover (whether that be an actual cover or aluminum foil).
Q: Should the meat be submerged in the liquid?
A: Most likely not. Submerging the meat would be closer to boiling or stewing rather than braising. The exposed meat in a braise cooks differently than the meat which is submerged. If you are following a recipe which calls for the meat to be completely submerged, I would think twice before following that recipe.
Q: How does the meat stay moist if it is not covered by the liquid?
A: There are a couple different factors to this question. The first area we should look at is the fat content of the meat we are cooking. It is the fat that keeps the meat moist, not the liquid. For low fat braises, such as pork tenderloin, you may experience dryness. It is best to introduce fat into these dishes to keep them moist.
Additionally, heat is the enemy during braising. Most braises need to be taken slow and low. The idea is to ease the meat into cooking, not shock it with high temperatures. Additionally, if the temperatures get too high, your braising liquid will start to boil which will inevitably toughen the meat.
Q: I’m short on time. Is there a way to speed up braising?
A: Again, it depends on what you are braising. Vegetables can most likely be braised in under 20 minutes, with some (like baby bok choy) ready in under 5 minutes. For longer braises, with larger tough cuts, there really is no way to speed up the braising process. The idea here is to cook slow and low, allowing the flavors to develop and the meat to tenderize. Cranking up the temperature on the oven will only result in a tougher outcome.
Q: Is there a way to pause the braise?
A: Yes. You can stop the cooking once the meat has reached an internal temperature of 140 degrees. After this point, you need to do one of two things. The first is to keep the meat at this temperature if possible. This is pretty hard to do without having it dry out. I would only suggest this if you are going to try to continue the cooking later that day. The second way is to cool the meat to 40 degrees and store it in the refrigerator. When you go to reheat, take out of the refrigerator about an hour before you are going to resume cooking so that it comes up to room temperature. Continue to braise until it has reached the desired temperature.
Q: How can I alter the cooking times for smaller cuts of meat?
A: There are many times that I put together recipes with huge cuts. The cook times reflect such big cuts too. My suggestion is to start cooking the braise and then remove it after an hour. Temp the meat and figure out how fast it is cooking. for example, if you need to get to 200 degrees internal temperature and after an hour you are at 50, you most likely need about 3 more hours. Now, this is not an exact science, but if you temp it again in an hour and you’re at 120, you know you need to check again in about an hour until you get to the desired internal temperature.
Q: There is too much braising liquid. How can this be reduced?
A: Whenever there is too much liquid at the end, my suggestion is the following: stir the liquid to incorporate all the goodness. Ladle some out into a fat separator. Pour out the juice that you need to reduce. If you still have a lot of liquid left over, strain that as well and use it as a stock for some soup or add it into some root vegetables to make another delicious braise. The only thing to discard is the fat!
Q: I keep getting flames engulfing my meals on the grill. How can I stop these?
A: Flare ups are annoying at best and impossible to stop unless you are cooking non-fat foods. Ever notice that boneless, skinless chicken breasts never flare up? No fat = no flames. But, no fat is boring. So how can we control the flames? Through good preparation.
The first step is to not overcrowd your grill. I use a natural gas grill and always have room to move foods that are not cooperating. So I’ll keep my left three burners on high and the right two on low. Once a flare up starts, I’ll move the food off the high side onto the low side until things calm down. The fat tends to burn off rather quickly.
You can also use the warming rack on your grill (if you have one). This area allows the fat to melt but keeps the food out of the flames. Warming racks are very versatile and can certainly be used for more than just warming. I’ve also put foil on the warming rack to completely contain the fat when I am cooking really high fat foods (like chicken wings).
Lastly, you need to stay near your grill when cooking. So many people put food on and then wander away to get something else done. The thought is that you’ve got six or eight minutes before it needs to be flipped, so why not multi-task. The problem is that flare ups can happen in an instant, ruining your meal so quickly that it can be discouraging. Stick by the grill to take care of your food!
Q: My grill catches on fire a lot. What can I do?
A: The first thing NOT to do is use water when this happens. Water and grease don’t play well together. They can explode and cause much bigger problems than just a flare up. The suggested method is to use baking soda to put out a grease fire on the grill.
Now, if your grill is catching fire a lot, that also means that it is time to clean your grill. When it is cool, take off the grate and burner covers. Get in there with a wire brush and a shop vac to get all that stuff out of there. A clean grill is a happy grill, with a lot less fires.
Q: My grill has hot spots and cold spots… what can I do?
A: Work around them. Getting to know your grill is important. Most grills have hot and cold spots, which is why it is hard to just jump in on another persons grill. I’ve burnt the heck out of meat by leaving it in an unknown hotspot for too long.
Q: I keep getting flames engulfing my meals on the grill. How can I stop these?
A: Flare ups are annoying at best and impossible to stop unless you are cooking non-fat foods. Ever notice that boneless, skinless chicken breasts never flare up? No fat = no flames. But, no fat is boring. So how can we control the flames? Through good preparation.
The first step is to not overcrowd your grill. I use a natural gas grill and always have room to move foods that are not cooperating. So I’ll keep my left three burners on high and the right two on low. Once a flare up starts, I’ll move the food off the high side onto the low side until things calm down. The fat tends to burn off rather quickly.
You can also use the warming rack on your grill (if you have one). This area allows the fat to melt but keeps the food out of the flames. Warming racks are very versatile and can certainly be used for more than just warming. I’ve also put foil on the warming rack to completely contain the fat when I am cooking really high fat foods (like chicken wings).
Lastly, you need to stay near your grill when cooking. So many people put food on and then wander away to get something else done. The thought is that you’ve got six or eight minutes before it needs to be flipped, so why not multi-task. The problem is that flare ups can happen in an instant, ruining your meal so quickly that it can be discouraging. Stick by the grill to take care of your food!
Q: My grill catches on fire a lot. What can I do?
A: The first thing NOT to do is use water when this happens. Water and grease don’t play well together. They can explode and cause much bigger problems than just a flare up. The suggested method is to use baking soda to put out a grease fire on the grill.
Now, if your grill is catching fire a lot, that also means that it is time to clean your grill. When it is cool, take off the grate and burner covers. Get in there with a wire brush and a shop vac to get all that stuff out of there. A clean grill is a happy grill, with a lot less fires.
Q: What is direct heat grilling?
A: Direct heat grilling involves cooking food directly over the heat source, ideal for quick-cooking items like burgers, steaks, and vegetables, ensuring even cooking by flipping the food halfway through.
Q: What is indirect heat grilling
A: Indirect heat grilling cooks food next to, not directly over, the heat source, perfect for larger cuts of meat requiring longer cooking times, allowing for slow and even cooking without direct flame exposure.
Q: What are the advantages of using charcoal as a grilling fuel?
A: Charcoal grilling imparts a smoky flavor to food, provides intense heat, and is ideal for achieving a deep sear on meats. Although it requires more time to heat up, it offers excellent flavor control.
Q: What are the benefits of marinating meats before grilling?
A: Marinating meats enhances flavor and tenderness. Allow meats to marinate for at least 30 minutes to several hours, and season them with salt, pepper, and spices just before grilling for the best results.
Q: What are some tips for achieving perfect grill marks?
A: To achieve perfect grill marks, preheat your grill, clean and oil the grates, and pat dry foods before grilling. These steps help create distinct grill marks and enhance the flavor and texture of your food.
Q: My grill has hot spots and cold spots… what can I do?
A: Work around them. Getting to know your grill is important. Most grills have hot and cold spots, which is why it is hard to just jump in on another persons grill. I’ve burnt the heck out of meat by leaving it in an unknown hotspot for too long.
Cooking Tips: Methods
Q: How should I wash my vegetables?
A: Always wash your vegetables thoroughly to remove any dirt or pesticides. Use a vegetable brush for hard-skinned veggies like potatoes and carrots.
Q: Why is it important to cut vegetables into uniform sizes?
A: Cutting vegetables into uniform sizes ensures even cooking. This is particularly important for methods like roasting and stir-frying.
Q: What is blanching, and when should I use it?
A: Blanching involves briefly boiling vegetables and then plunging them into ice water. This method is great for maintaining the bright color and crisp texture of vegetables like green beans and broccoli.
Q: How can I prevent my vegetables from becoming soggy when roasting?
A: To prevent sogginess, spread the vegetables out in a single layer on the baking sheet. Overcrowding can cause them to steam instead of roast.
Q: What’s the best way to steam vegetables?
A: Place the vegetables in a steamer basket over boiling water and cover. Steam until they are tender but still slightly crisp. This usually takes about 5-10 minutes, depending on the vegetable.
Q: How do I know when sautéed vegetables are done?
A: Sautéed vegetables are done when they are tender but still have a bit of bite. They should be slightly browned and caramelized.
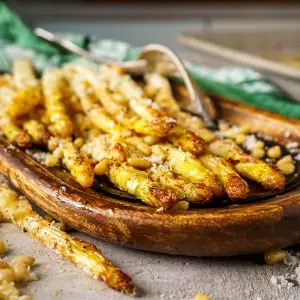
Q: Why should I use high heat for stir-frying?
A: High heat allows vegetables to cook quickly, preserving their color and crunch while developing a bit of char for extra flavor.
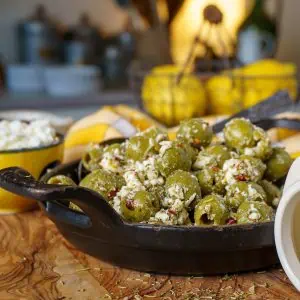
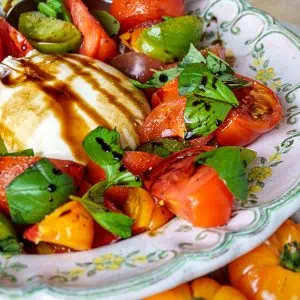
Q: What seasonings work well with vegetables?
A: Salt, pepper, garlic, and olive oil are great basics. Experiment with herbs like thyme, rosemary, or dill, and spices like cumin or paprika to enhance flavors.
Q: How can I add more flavor to my vegetables without adding a lot of calories?
A: Use fresh herbs, citrus zest, and vinegars. Roasting vegetables can also bring out their natural sweetness and add depth of flavor without extra calories.
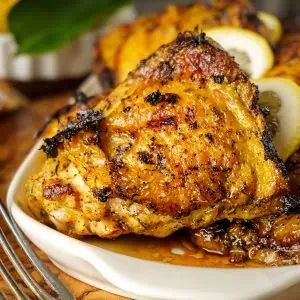
Q: What’s the best way to choose the right cut of meat?
A: Choose a cut based on your intended cooking method. For grilling or roasting, opt for tender cuts like ribeye or pork loin, which are naturally juicy and flavorful. For slow cooking or braising, go for tougher cuts like chuck roast or brisket, which become tender and flavorful over long cooking periods.
Q: How early should I season my meat?
A: Season your meat well in advance to enhance its flavor. Ideally, marinate or apply seasoning several hours before cooking or overnight if possible. This allows the flavors to penetrate deeply into the meat, resulting in a more robust taste.
Q: Why is it important to let meat rest after cooking?
A: Resting meat after cooking is crucial because it allows the juices, which are driven to the center during cooking, to redistribute throughout the meat. This makes the meat juicier and more tender. Rest the meat uncovered on a plate or cutting board for about 5-10 minutes before slicing.
Q: How can I ensure my meat is cooked to the right temperature?
A: Use a meat thermometer to accurately check the doneness of the meat. Insert the thermometer into the thickest part of the meat without touching bone. This helps prevent both undercooking and overcooking, ensuring the meat is safe to eat and has the desired texture.
Q: Why should I preheat my pan or grill?
A: Preheating your pan or grill is essential for achieving a good sear. When the surface is hot, it creates a caramelized crust on the meat, which enhances flavor and texture. Preheat for a few minutes before adding the meat to ensure even cooking and a beautiful sear.
Q: What happens if I overcrowd the pan or grill?
A: Overcrowding the pan or grill can cause the meat to steam rather than sear. This happens because the meat releases moisture, which prevents proper browning. To avoid this, cook the meat in batches if necessary, giving each piece enough space for even cooking and browning.
Q: How often should I flip the meat while cooking?
A: Flip the meat only once or twice during cooking. Let it sear undisturbed on one side to develop a crust before flipping. Frequent flipping can hinder proper browning and lead to uneven cooking. Allow the meat to develop a good sear before turning it over.
Q: How does thickness affect cooking times?
A: Thicker cuts of meat require longer cooking times compared to thinner cuts. The thickness impacts how heat penetrates the meat, so adjust your cooking time based on its thickness and size. Use a meat thermometer to ensure the meat reaches the desired internal temperature.
Q: What’s the benefit of resting meat after cooking?
A: Resting meat after cooking allows the juices to redistribute throughout the meat. This process helps the meat retain its moisture and results in a more tender and flavorful final product. Rest for about 5-10 minutes before slicing to enjoy the best texture and taste.
Q: Why should I slice meat against the grain?
A: Slicing meat against the grain ensures that the muscle fibers are cut short, resulting in a more tender and easier-to-chew texture. Slicing with the grain can make the meat tougher and chewier. Look for the direction of the muscle fibers and cut perpendicular to them for optimal tenderness.