Sharing is caring!
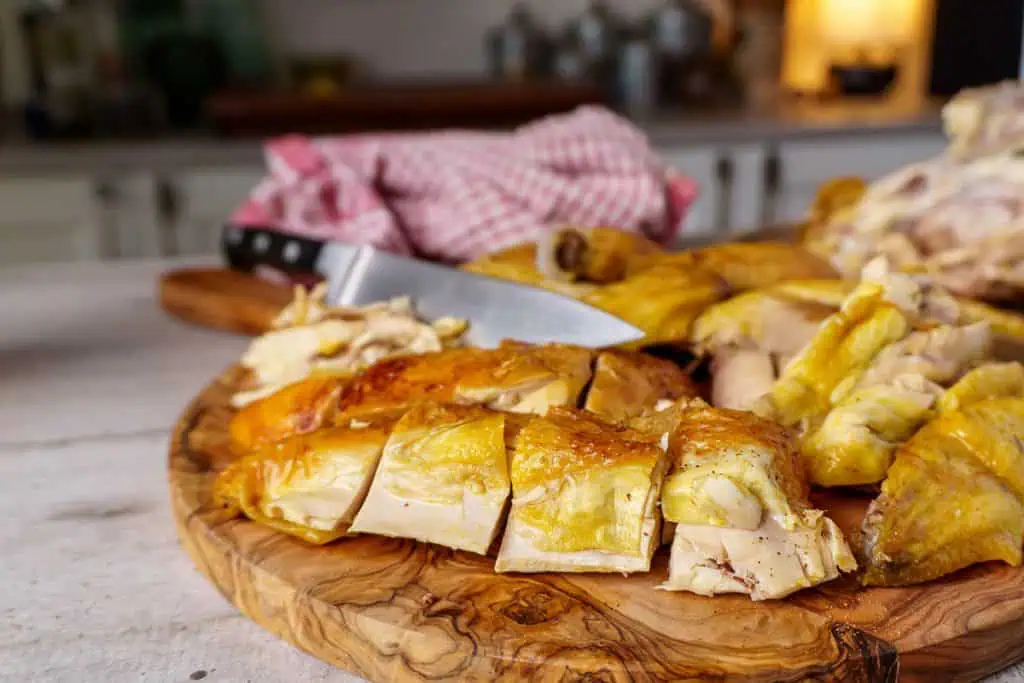
Today, I am going to share with you the best way to cut a rotisserie chicken. Over the years, I have cut thousands of rotisserie chickens with this method. Everyone loves it because the skin remains intact on the breasts, and each piece is easy to enjoy.
With a bit of practice, you too will be able to easily cut and serve rotisserie chicken… and everyone will be so impressed with the presentation! Let’s take a look at how to cut a rotisserie chicken together.

Table of Contents
Reasons to love Rotisserie Chicken?
- A fast and economical way to enjoy delicious chicken!
- Typically more juicy and flavorful than roasted chicken!
- A ready-made meal this is healthy and nutritious!
- Provides enough protein in a meal for a family of four!
- The skin is perfectly cooked and simply delightful to eat!
- Almost no cleanup!
- The leftover carcass can be used to make rotisserie chicken stock!
- It seems like everyone loves rotisserie chicken… I do too!
How To Make Rotisserie Chicken
To make a rotisserie chicken, there are a couple of things we have to review first.
- You need a spit that rotates to make rotisserie chicken. This can be in a toaster oven, your regular oven, over a grill or even over a fire (I have one of these at my house- it’s an antique and awesome to use!). Without a rotating spit, all we will make is a baked or roasted chicken. There is a huge difference.
- The chicken going on the spit needs to be “trussed,” meaning that the wings, legs, and thighs are tied close to the chicken. Without being trussed, the extremities of the chicken cook faster than the breast meat, leaving the chicken looking strange and unevenly cooked. There’s nothing worse than an unevenly cooked chicken. Make sure you are buying a trussed bird or trussing it yourself with butcher twine.
Once we have established that we have a spit to rotisserie the chicken and a trussed bird, it’s time to get started!
- Start by installing your trussed chicken on the rotating spit. I have a quick start guide on how to put chicken on rotisserie.
- Create your rotisserie chicken spice blend. This is an optional step, but one that will make the skin absolutely irresistible. If you choose not to make a spice blend, just salt and pepper the chicken.
- Install the spit according to the manufacturer’s instructions and cook the bird until an instant-read thermometer shows 165°F when inserted into the thigh nearest to the bird’s torso. This is the spot that takes the longest to cook.
- Once the bird is cooked, remove it using an oven mitt to protect your hands. Unscrew the clamps and remove the spit. Let the bird rest for about 10 minutes to cool down and allow the juices to redistribute.
- Now, it’s time to cut the bird.

Tools you’ll need
Below is the list of tools you’ll need to cut a rotisserie chicken:
- Cutting board
- Tongs
- Sharp knife
- Large plate or platter for the cut chicken
How to Cut a Rotisserie Chicken Into Pieces: Step By Step Guide
For perfectly portioned pieces and ease of use, follow this simple method. Here’s the best way to cut rotisserie chicken:
- Place the cooked rotisserie chicken on a cutting board (preferably with a well to catch any juices) with the breast side facing up.
- Cut the trussing (the twine or string that holds the legs and wings to the bird) and pull. The butchers’ twine should free itself easily. Discard the twine.
- Start with the legs. Pull one of the legs slightly away from the chicken. Using your sharp knife, gently slice through the skin connecting the thigh to the chicken. Next, push the leg quarter (the leg and thigh) down, exposing the hip joint. Place your knife in the hip joint and separate. You will now be able to pull off the leg quarter. Repeat this to remove the other leg quarter.
- Place the leg quarters on the cutting board. Separate the drumsticks and thighs into two separate pieces by finding the joint and cutting through the cartilage with your knife. Place the legs and thighs on the platter.
- Next, remove half of the breast meat. Using your knife, we will cut from the keel bone to the wishbone (the back of the chicken to the front). This cut should be made just slightly off center from the bird, toward the side you just removed the leg quarter. Cut down about one inch, sliding your knife along the keel bone. When you reach the wishbone, use your free hand to gently pull the breast meat away from the bird while sliding your knife down the wishbone. Continue to peel the breast meat away from the chicken, being careful not to cut your hand or burn it if the chicken is still very hot. This step can be done using tongs as well.
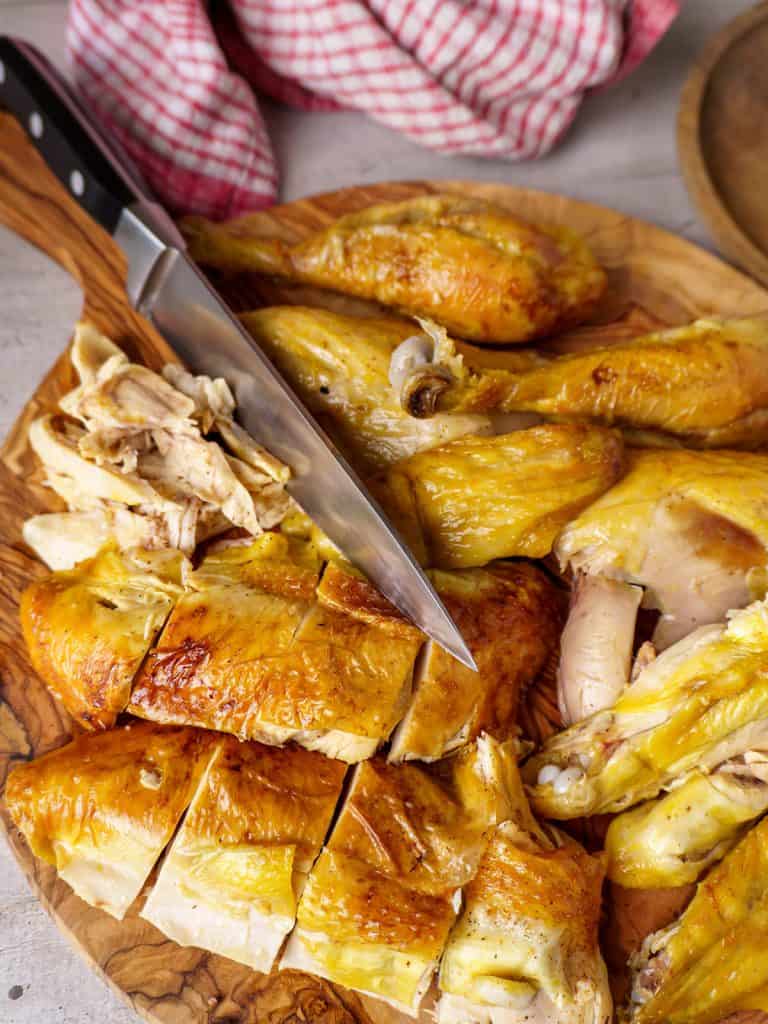
- Once the breast meat has been removed (hopefully with the skin still attached), place it on the cutting board. I cut the breast meat into 5-6 sections, ensuring each one has the skin still attached. Gently slide your knife under the segmented breast meat and transfer it to the platter.
- Repeat this process of removing the breast and slicing for the other side of the breast.
- Next, gently pull on the wings to remove them. You will find the wing joint where the wing is attached to the bird. Place your knife in the joint and separate it from the bird. Separate the flat from the drum and cut off the wing tips if they are still attached. Discard the tip and place the flat and drum on the platter. Repeat for the remaining wing.
- Flip the chicken carcass over. On the bottom of the carcass, near the area where we separated the thigh from the chicken, you will find a meaty section called the oyster. It is not actually an oyster, but it is called that because it resembles the shape of one. This is one of the absolute best pieces of the entire chicken.
- Now, you can remove any remaining bits and pieces of chicken from the carcass and place them on the platter. Once completed, it’s a great time to put the carcass in a freezer bag to make rotisserie chicken stock later.
- If there are juices on the cutting board, drizzle them over the platter before cleaning up.
How To Carve a Chicken?
Carving a chicken might seem daunting, but with the right steps, you can make it easy and efficient. Here’s a simple guide to help you carve a rotisserie chicken like a pro:
- Prepare your tools: Make sure you have a sharp carving knife, a carving fork, and a sturdy cutting board.
- Remove the legs and thighs: Cut through the skin between the body and the leg. Bend the leg back until the joint pops, then cut through the joint to remove the leg. Repeat on the other side.
- Separate the drumsticks and thighs: Locate the joint between the drumstick and thigh, then cut through it to separate them. Repeat for the other leg.
- Remove the wings: Pull each wing away from the body and cut through the joint where it meets the chicken breast.
- Carve the breasts: Make a long, deep cut along one side of the breast bone. Then, slice downward, following the ribcage, to remove the breast. Repeat on the other side. Slice the breasts crosswise into smaller pieces if desired.
With these steps, you’ll have perfectly carved chicken pieces ready to serve and enjoy!
Tips for Best Results
- I find that the best time to cut a rotisserie chicken is when it has cooled enough. I can still handle it easily without worrying about burning my hands, but it is still warm enough that the meat separates from the bone with ease. As the chicken gets closer to room temperature, removing the meat from the bone isn’t as clean as when it is warmer.
- Here are a few tips on avoiding waste when cutting your rotisserie chicken:
- Use a sharp knife: The fastest way to make this process messy and inefficient is to use a dull knife. The cuts will not be crisp, leaving too much meat on the carcass and it will be difficult to cut through the joints, possibly tearing the chicken rather than cutting it.
- Use an appropriate knife: I wouldn’t use a huge chef’s knife because it is unwieldy, but a paring knife is likely too small. We need to add just a bit of force when cutting through the joints, so a mid-sized knife is just about perfect. Avoid using a santoku knife, as getting the blade in the appropriate places is hard. I typically use a boning knife that is very sharp and easy to maneuver through the bird.
- Be patient and gentle: The idea is to get as many beautiful pieces of rotisserie chicken with the skin attached from the bird to the platter. Be patient and gentle with the bird. There is no race!
- After most of the larger cuts have been removed, go back over the chicken and lightly tear off any remaining chicken that looks good to eat. You will be surprised at just how much chicken is around the rib area and behind the thighs. This is all delicious!
- Once the chicken has been cut and picked over, save the carcass to make rotisserie chicken stock. I also save any chicken bones that are left over after we have finished eating the chicken. Toss them all in a freezer bag to make delicious homemade chicken stock at some point in the future.

Troubleshooting Common Issues
What to do if the meat is too dry?
This is a more common issue than you might imagine, particularly when dealing with store-bought average rotisserie chickens. I suggest taking the bird back to the store and asking for a different one. A dry rotisserie chicken should be a crime! If you don’t have time to do this, we need to get more fat back into the meat.
I suggest removing the chicken from the bones and shredding the meat. Place the shredded chicken in a nonstick pan on the stove over medium heat with a tablespoon of butter and a couple tablespoons of basic chicken stock or bouillon. Warm and stir until the butter and stock has been absorbed. The chicken will be more juicy.
How to deal with tough joints?
The joints are definitely the hardest part of cutting a rotisserie chicken. First, it is imperative to find the joint and not try to cut through the bone. You can typically locate the joint easily by lightly pulling the wing or thigh down and away from the bird. Once it is located, I suggest using a mid-sized, sharp knife. This will allow for pressure to be easily applied to the joint, and it will separate quickly.
How to make clean cuts?
I have to be completely up front in this section: your first chicken might not look like what I have cut. It takes time and practice to cut a chicken like this. Have patience with yourself and remember, practice builds proficiency. Plus, you get to enjoy juicy, delicious flavor of rotisserie chicken while you’re learning! With a bit of practice, you will be making perfectly clean cuts in no time.
Storage and Reheating Instructions
Once you have cut your rotisserie chicken, it’s a great time to look at how to store leftovers. Let’s take a look at how I do this:
Storage Tips
Place any leftover rotisserie chicken in an airtight container once it has cooled to room temperature. It will stay fresh in the fridge for 5-7 days before being consumed or tossed. I love eating rotisserie chicken cold, particularly the legs. Yum.
Reheating Tips
I have found the best way to reheat rotisserie chicken is actually in the oven. Preheat the oven to 350°F and place the pieces of chicken needing to be warmed up in a covered, oven proof dish. Once warmed, enjoy!
You can also reheat in a covered pan on the stove with one or two tablespoons of water added to rehydrate. Place over medium-low heat until heated through.
Lastly, you can microwave to warm the chicken. Place on a plate that is covered and microwave on medium until heated through.
Freezing Tips
Rotisserie chicken freezes really well, but not for a very long time. I find that frozen rotisserie chicken gets freezer burned quite quickly, so consume within 3 months of freezing to prevent this from happening. Place any leftover rotisserie chicken in a freezer safe zip top bag and toss in the freezer until ready to use. Thaw in the fridge overnight and reheat according to the instruction above.

Conclusion
Learning to cut an entire rotisserie chicken takes a bit of practice, but once learned, it is a really good skill to have. Once I’ve either finished cooking my rotis chicken at home or have bought one at the store, it is on the table in under 5 minutes and everyone can chow down.
Over the years, I’ve shown dozens of people how to cut rotis chickens easily in my cooking school. My best advice is to have patience, be gentle and use the appropriate sharp knife. With these three things, you’ll be cutting up rotisserie chicken like a pro in no time flat.
Rotisserie Chicken Recipes To Try:
Here are my favorite leftover rotisserie chicken recipes that I always enjoy:
- Rotisserie Chicken Soup
- Rotisserie Chicken Recipe
- Rotisserie Chicken Salad
- Also, try adding the shredded chicken to any salad, tacos (I love my Cheese Shell Tacos), wraps or buns if you are not on a low-carb diet, casseroles, or pizza toppings!
FAQs
It is easiest to cut a rotisserie chicken when it is warm. If the chicken is too hot, it is hard to handle and cut efficiently. Too cold and the meat does not separate easily from the bone. Instead, try to cut the chicken when it’s warm.
The slicing is reserved for the breast meat only. First, the meat must be removed by gently slicing from the keel bone to the wishbone (back of the chicken to the front) and gently separating the meat from the bone. Track the knife down the wishbone and separate the breast meat from the bird. Now, place the breast meat on the clean cutting board, skin side up. Slice down from the top into 5-6 segments and serve.
There are 0 g carbs in rotisserie chicken.
To cut up a whole chicken, begin by removing the legs and thighs, then separate the wings from the breast. For a simple debone rotisserie chicken hack, keep the skin intact as you gently pull the meat away from the bones with your fingers or a fork.
How To Cut Rotisserie Chicken?
Equipment
- Cutting board
- Tongs
- Sharp knife
- Large plate or platter for the cut chicken
Instructions
- Place the cooked rotisserie chicken on a cutting board (preferably with a well to catch any juices) with the breast side facing up.
- Cut the trussing (the twine or string that holds the legs and wings to the bird) and pull. The butchers' twine should free itself easily. Discard the twine.
- Start with the legs. Pull one of the legs slightly away from the chicken. Using your sharp knife, gently slice through the skin connecting the thigh to the chicken. Next, push the leg quarter (the leg and thigh) down, exposing the hip joint. Place your knife in the hip joint and separate. You will now be able to pull off the leg quarter. Repeat this to remove the other leg quarter.
- Place the leg quarters on the cutting board. Separate the drumsticks and thighs into two separate pieces by finding the joint and cutting through the cartilage with your knife. Place the legs and thighs on the platter.
- Next, remove half of the breast meat. Using your knife, we will cut from the keel bone to the wishbone (the back of the chicken to the front). This cut should be made just slightly off center from the bird, toward the side you just removed the leg quarter. Cut down about one inch, sliding your knife along the keel bone. When you reach the wishbone, use your free hand to gently pull the breast meat away from the bird while sliding your knife down the wishbone. Continue to peel the breast meat away from the chicken, being careful not to cut your hand or burn it if the chicken is still very hot. This step can be done using tongs as well.
- Once the breast meat has been removed (hopefully with the skin still attached), place it on the cutting board. I cut the breast meat into 5-6 sections, ensuring each one has the skin still attached. Gently slide your knife under the segmented breast meat and transfer it to the platter.
- Repeat this process of removing the breast and slicing for the other side of the breast.
- Next, gently pull on the wings to remove them. You will find the wing joint where the wing is attached to the bird. Place your knife in the joint and separate it from the bird. Separate the flat from the drum and cut off the wing tips if they are still attached. Discard the tip and place the flat and drum on the platter. Repeat for the remaining wing.
- Flip the chicken carcass over. On the bottom of the carcass, near the area where we separated the thigh from the chicken, you will find a meaty section called the oyster. It is not actually an oyster, but it is called that because it resembles the shape of one. This is one of the absolute best pieces of the entire chicken.
- Now, you can remove any remaining bits and pieces of chicken from the carcass and place them on the platter. Once completed, it’s a great time to put the carcass in a freezer bag to make rotisserie chicken stock later.
- If there are juices on the cutting board, drizzle them over the platter before cleaning up.
Video

Notes
Sharing is caring!


