Sharing is caring!
Unlock the secrets of braising with these easy braising tips for beginners! Braising isn’t just about cooking; it’s about transforming ordinary cuts of meat into extraordinary dishes bursting with flavor. Imagine the savory aroma filling your kitchen as your dish simmers to perfection, promising a luxurious meal without the fuss. That’s what I want you to experience with my tips!
I love how braising adds rich flavor to any meat dish. The tender perfection makes my family a fan of my braising recipes – always a good idea for a healthy dinner so let’s jump into the details right away!

Table of Contents
What Can You Braise?
Braising isn’t limited to meats—it’s a versatile technique that works wonders for veggies and even fruits! Almost any type of meat can be braised with adjusted cooking times to achieve tender, flavorful results. Additionally, many vegetables take on exceptional flavor when braised. Surprisingly, certain fruits like pears, apples, and bananas can also be braised to create unique and delicious dishes.
To master braising, start by searing your ingredients in a hot pan before adding liquid and reducing the heat to medium low. This gentle simmering over medium-low heat allows the flavors to meld and intensify, resulting in dishes that are rich and complex in taste.
Select The Perfect Cookware
When it comes to braising, the choice of cookware can make a big difference. Personally, I prefer heavy-bottomed pans or cast iron for braising. These types of pans distribute heat more evenly and are less prone to temperature fluctuations, resulting in better cooking control.
In professional kitchens, a variety of vessels for braising, including braising pans, roasting pans, and stock pots are used. At home, I use a round bottom pan with a clear glass lid or my pressure cooker.
Check out my Kitchen Essential Guides (coming soon) to know all of my tried-and-tested kitchen tool recommendations as well!
The key consideration when selecting cookware for braising is achieving a good, tight seal with the cover, whether it’s an actual lid or aluminum foil. This seal helps trap moisture, ensuring the meat cooks evenly and stays tender throughout the braising process.
Essential Ingredients for Braising
When it comes to braising, certain essential ingredients elevate the flavor and texture of your dishes. Each of these components plays a crucial role in enhancing the texture and taste of meats or vegetables during the slow cooking process:
Clarified Butter
Ideal for braising chicken thighs, pork shoulder, cabbage, or broccoli, ghee or clarified butter avoids burning and enhances flavor. It ensures a rich taste without diluting the natural braising liquid.
Broth
A vital base for braising, broth adds flavor and moisture. Chicken broth enriches poultry dishes, beef broth deepens beef flavors, and vegetable broth serves as a versatile option for vegetarian dishes.
Wine
Wine adds complexity and depth. Red wine imparts bold flavors and acidity, while white wine offers a lighter, brighter touch. Both types contribute unique flavors based on the dish.
Aromatics
Onions, garlic, carrots, and celery form the flavor foundation.
- Onions provide sweetness and richness.
- Garlic adds aromatic depth.
- Carrots and celery bring earthy sweetness and subtle herbal notes.

Enhancing Flavors with Herbs and Spices
Enhancing flavors with herbs and spices is a transformative aspect of braising and grilling. Herbs like rosemary, thyme, and bay leaves add aromatic complexity, infusing the dish with earthy and floral notes. Meanwhile, spices such as black pepper, paprika, and cumin bring warmth and depth to braised and grilled foods, elevating their flavor profiles.
Herbs:
- Rosemary
- Thyme
- Bay leaves
Spices:
- Black pepper
- Paprika
- Cumin
Braising Vegetables: Tips and Techniques
Braising vegetables enhances their natural flavors, turning them into tender and delicious dishes. Mastering braising techniques will elevate your meals, whether you’re a vegetarian or seeking creative side dishes. Here’s how to achieve perfect texture and flavor.
Choosing the Right Vegetables
Opt for vegetables that hold up well during slow cooking. Root vegetables like carrots, potatoes, and parsnips are ideal due to their firm texture. Sturdy greens like kale, collard greens, and cabbage also braise well. Cauliflower and broccoli can be braised for added variety.
Prepping Vegetables
Prepare vegetables to ensure even cooking and flavor absorption. Cut root vegetables into uniform pieces and wash leafy greens thoroughly, removing tough stems. Lightly sauté vegetables in oil before adding braising liquid to enhance their natural sweetness.
Braising Techniques for Vegetables
Use gentle, low-heat braising to maintain texture and flavor.
- Use a heavy-bottomed pot or Dutch oven for even heat distribution.
- Add enough braising liquid (butter, broth, or wine) to partially cover the vegetables.
- Cover tightly with a lid to trap steam and cook until tender.
- Finish with fresh herbs and a squeeze of lemon juice for added brightness.
Braising on the Stovetop
For quick-cooking proteins like fish or vegetables, the stovetop is efficient. For longer braises like pork shoulder or ribs, use the oven. Smaller proteins like chicken thighs also braise well on the stovetop, but be cautious of excessive heat that may cause burning. The oven provides even heat, ensuring better control over the cooking process.

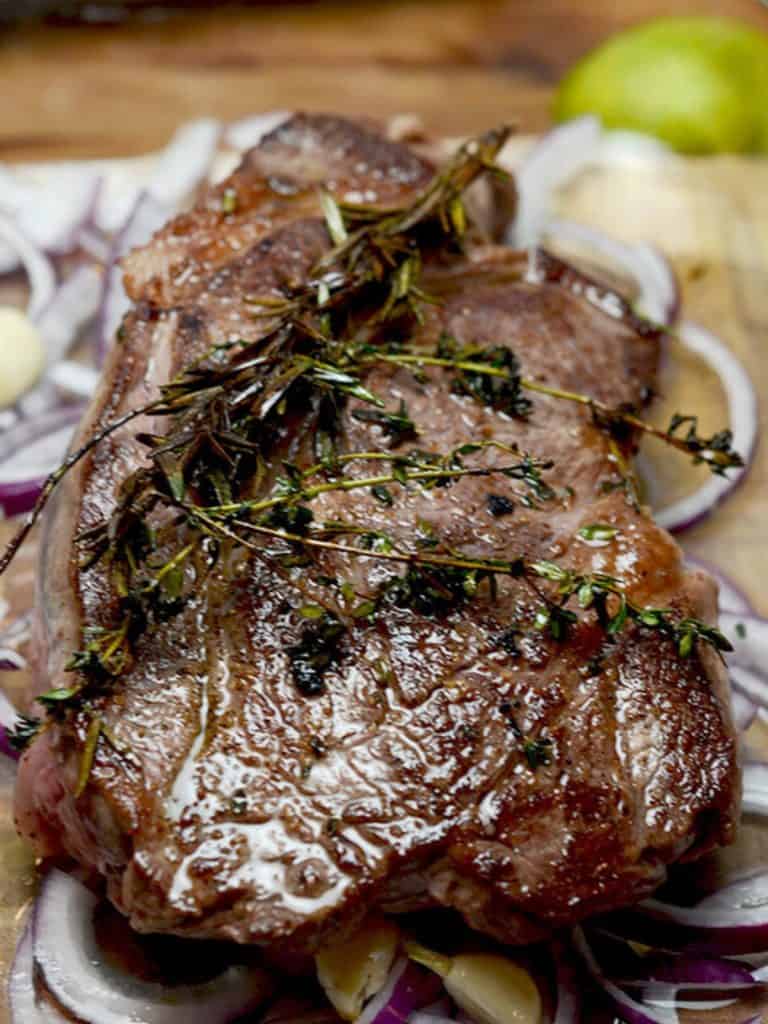
Braising Meat: Tips and Techniques
Braising meat results in tender, flavorful dishes. Whether you’re cooking beef, pork, chicken, or lamb, these tips will enhance your meals.
Submerging the Meat
Avoid fully submerging meat in liquid when braising; this is more like boiling or stewing. Traditional braising involves partially covering the meat, which ensures a slow, controlled cooking process that tenderizes and flavors the meat.
Keeping Meat Moist
- Fat Content: The natural fat in meat helps keep it moist. Lean cuts may need additional fats to prevent drying out.
- Cooking Temperature: Braise meat slowly at low temperatures to tenderize it without toughening. High heat can cause the liquid to boil, resulting in tougher meat.
Braising in the Oven
For braising large cuts of meat, use high-sided cookware like a Pyrex dish, roasting pan, or Dutch oven. A large soup pot with high sides also works to prevent spills when moisture is released.
Add the meat to the chosen vessel as per your recipe. Cover tightly with a lid or aluminum foil.
Pro Tip: If using a baking dish without a lip, extend the foil to the bottom of the dish and pinch it together to create a seal. Roasting pans with a lip allow for better foil coverage and a tighter seal.
Once covered, place the dish in a preheated oven and cook according to your recipe’s instructions.
Braising vs. Stewing: Understanding the Difference
Braising and stewing are both popular cooking methods that involve slow cooking with liquid, but they differ in technique and the types of ingredients used. Understanding the distinctions between braising and stewing can help you choose the right method for different recipes and ingredients.
Braising
- Uses larger pieces of meat or vegetables cooked in a small amount of liquid at low heat.
- Meat is often seared first, then cooked slowly in a covered pot with a small amount of broth or wine.
- Results in moist, tender dishes with rich, concentrated flavors.
Stewing
- Involves cooking smaller pieces of meat, poultry, seafood, or vegetables fully submerged in a larger quantity of liquid.
- Ingredients are cooked slowly with broth, stock, or water, along with aromatics and seasonings.
- Produces a thick, hearty dish with uniform texture and well-developed flavors.
Patience Is Key!
When it comes to speeding up braising, it all depends on what you’re cooking. Vegetables, for example, can often be braised in under 20 minutes, with some, like baby bok choy, ready in under 5 minutes. However, for longer braises involving larger, tougher cuts of meat, there’s no shortcut to speeding up the process.
The essence of braising lies in slow, low cooking, which allows flavors to develop and meat to tenderize. Increasing the oven temperature or rushing the process will only lead to tougher results. For optimal outcomes with braising, patience and gentle cooking are key.
If you want to reduce the braising time for vegetables, blanch them in hot water before adding them to the braise. This pre-cooking step can help soften the vegetables more quickly and shorten the overall braising time while preserving their texture and flavor.
Need a Pause? Braise and Re-Braise!
To pause the braising process and keep your meat safe and flavorful, use these strategies:
- Keep Cooking Warm: Once the meat reaches 140°F, you can pause by maintaining this temperature. Set your oven to 135°F to average 140°F. This method is best if you plan to resume cooking the same day.
- Cool and Store: If pausing for longer, cool the meat to 40°F and refrigerate. Before resuming, let the meat come to room temperature for about an hour. Continue braising until it reaches the desired tenderness.
Note: If refrigerating, place the meat on a baking sheet to prevent spills and keep your fridge clean.

Master the Cooking Times for Different Cuts of Meat
When working with recipes designed for large cuts of meat like pork butt, lamb shoulder or beef chuck, let’s review some tips on how to estimate your cook times. . Here’s how I do it:
- Begin by following the initial cooking instructions for your braise from the recipe.
- After an hour of cooking, use a meat thermometer to check the required internal temperature. Let’s say you need to reach an internal temperature of 200 degrees Fahrenheit, and after one hour you’re only at 50 degrees.
- Based on this rate of cooking, you can estimate that you’ll need about 3 more hours to reach your desired temperature. So, estimate the remaining cooking time based on the current rate of cooking compared to your desired internal temperature.
- Keep in mind that this is not an exact science, but it gives you a good starting point. Check the temperature again after another hour. If you’ve reached 120 degrees, you’ll know that you’ll likely need to check again in about an hour until the meat reaches the desired internal temperature. It’s all just math!
Adjust Excess Braising Liquid
If you have too much braising liquid at the end of cooking, don’t worry—there are simple steps to reduce it and make the most of those flavorful juices.
- Stir the liquid well to incorporate all the delicious flavors.
- Use a ladle to transfer some of the liquid into a fat separator to remove excess fat. Pour out the reduced liquid that you want to keep for serving or sauce.
- If you still have more liquid than needed, strain it and save it for making soup stock or use it to braise additional root vegetables for another tasty dish. Typically, these extra juices freeze really well. Remember to leave headspace for expansion if freezing.
The key is to avoid discarding any of those tasty juices—except for the excess fat. With these tips, you can efficiently manage your braising liquid and create additional recipes with the leftovers.
Prop tip: To remove excess fat from the braising liquid, add a cup of water to the liquid before using the fat separator. This will help separate the fat more effectively, leaving you with a flavorful and lean sauce or cooking liquid.

Tips for Reheating Braised Dishes
Reheating braised dishes can be a great way to enjoy leftovers while preserving their flavors and textures. However, improper reheating methods can lead to dry or unevenly heated dishes.
In this section, we’ll explore helpful tips and techniques for safely and effectively reheating braised dishes to maintain their deliciousness and quality. Whether you’re reheating a pot roast, stew, or braised vegetables, these tips will ensure that your leftovers taste just as good as the first serving.
Reheating Braised Food on the Stovetop
For reheating braised foods, I prefer using a sturdy stainless steel pan with a tight-fitting glass lid. Stainless steel heats evenly and retains heat well, while the glass lid lets me monitor the process. Add the food and some braising liquid to the pan, cover it, and heat on medium. Once the pan is hot, lower the heat to avoid boiling away the flavors.
Braised food is already cooked, so avoid high heat to prevent overcooking and creating a mushy texture. If necessary, move the pan to a smaller burner and reduce the heat.
Reheating Braised Food in the Oven
For large quantities of braised food, use the oven for gentle reheating. Preheat the oven to 350°F and cover the dish tightly with a lid or foil to prevent drying out. Heat for 10-12 minutes or until the liquid starts to warm. If the food is refrigerated, it will take longer. Once the liquid is warm and steaming, remove the cover and continue reheating until the food is heated through, rotating as needed to avoid drying out.
Reheating Braised food in the Microwave
If you have been reading my blog for a while, you will notice that I am not a fan of microwaves despite the fact that I grew up with one cooking almost all my food when I was young. Maybe that is why I don’t like them!
All the being said, I realize that they are a modern convenience and oftentimes, in our busy lives, make things easier. Here are the steps that I would take to reheat braised food in the microwave:
- Portion the food you would like to have reheated into a microwave safe container that has a lid. Leave a bit of space between the lid and the container to prevent the lid from popping off during reheating.
- Place your braised leftovers in the microwave on medium heat. After a minute or two, pause the microwave. Using tongs, rotate the food inside.
- Repeat this process until the food is heated through.
Keep in mind that although the microwave might save some time, there are drawbacks as it relates to braised food. If the food is not rotated, the moisture inside the food can get extremely hot in some areas and not in others. This can result in a tough texture and loss of flavor.
Choosing to Braise in the Oven or on the Stovetop
In professional kitchens, chefs often choose between stovetop and oven methods based on the dish’s requirements and size. For large cuts and large amounts of braised foods, the oven is often the best choice. For more tender items and smaller quantities, the stovetop can be a wonderful option.
At home, you can achieve similar results by selecting the appropriate cooking method based on the recipe and the ingredients you’re using. Whether you’re braising on the stovetop for quick-cooking proteins or opting for the oven for longer braises, adjusting your cooking approach can make a significant difference in the final outcome of your dishes.
Wrap Up
Discover the joy of braising with my essential braising tips for beginners! I have shared all my braising secrets I learned as a professional chef in my catering business. I’m damn sure I your next gathering, people will be talking about the delicious food you made. So, apply these cooking tips in your kitchen, and wait for my next guide. I have plenty of cooking secrets to share!
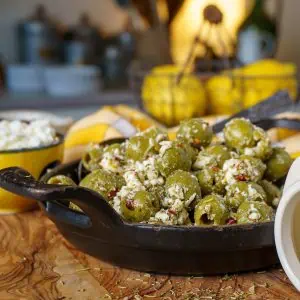
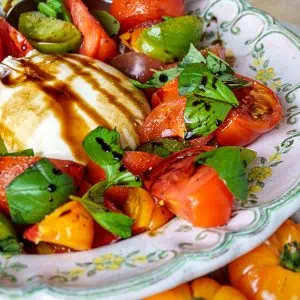
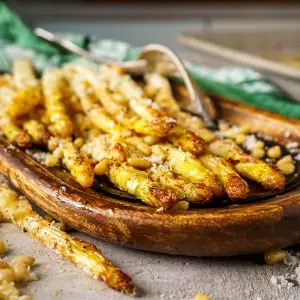
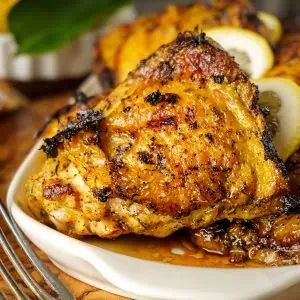
Braising Recipes To Try
Here are some delicious braising recipes that are perfect for cozy dinners and are sure to impress your family and friends.
Is it low carb? Learn more about it:

Understanding Carbs In Guacamole: Low Carb or Keto?
Delve into the world of guacamole and its carb content—essential knowledge for low carb and keto enthusiasts. Avocado’s creamy texture

What is Low Carb Diet? Carb Confusion Conquered!
Ever wondered what a Low Carb Diet really entails? I’ve broken down the basics to help you understand how reducing

Low Carb Diet for Weight Loss: Does It Actually Work?
Many studies suggest that a low carb diet can indeed be effective for weight loss. By restricting carbohydrates, the body

Scott Groth
Sharing is caring!