Sharing is caring!
My Beer Can Chicken recipe is probably the most fun chicken recipe you can add to your low-carb menu. Although it is called beer can chicken, it has no beer or can. It just suggests the vertical cooking style that traditionally involves inserting a can in the chicken’s cavity and cooking it vertically. The result? Super crispy chicken skin with possibly the most tender and juicy chicken you’ve ever tasted. Best of all, the recipe only features 4 ingredients and it is ready in 40 minutes. Let’s make it together!
This recipe is: Low Carb, Keto, Gluten Free, Dairy Free and Paleo


Table of Contents
5 Reasons To Love This Recipe
I have made this beer can chicken grill recipe countless times for many reasons including:
- The perfect recipe for a summertime BBQ.
- None of the mess that results from using a real beer can, but all the flavor.
- No need for beer! It’s just what this chicken is called.
- Super low-carb, but nobody will ever ask because it is just delicious.
- You can cook the chicken and some veggies at the same time!
Is Beer Can Chicken Low-Carb?
Yes, while traditional beer can chicken is grilled with a half-full can of beer in its cavity, it absorbs very few carbohydrates that won’t upset a low-carb dieter’s goals. However, if you are on a very strict low-carb diet, it is safer to make beer can chicken without beer.
This recipe is remarkably low-carb, with a mere 1 g net carbs per serving. Chicken is a zero-carb food, and my recipe doesn’t feature beer. I ensured the other ingredients don’t exceed 1 g of carbs, so you can enjoy the chicken without worrying about a carb spike.
Beer Can Chicken Without Beer!
The recipe does not feature a beer can for many reasons. First, this is a gluten-free blog and I am not a fan of gluten-free beers. To be honest, they just make me miss the really good beers I drank for years. So, they’re not around the house. Plus, we can easily get a juicy bird by using stock or water in our vertical roaster. The flavor will be spot on if you get a good chicken and use minimal ingredients. No need for beer in this recipe!
But is it okay to use a beer can? Over all the years that I have been cooking, I’ve never seen any paint or plastic on anything that gets heated on the grill. Everything is either porcelain coated, stainless steel or iron. I’m not sure who thought that putting a beer can into the grill was a good idea.
Most beer cans are lined with plastic (to maintain freshness). You may get a super moist bird, but it’ll probably be chock full of BPA and other toxins. The same principle goes for the paint on the outside of the can. Paint isn’t meant to be heated in the grill. The whole idea is just crazy. Instead, let’s use the proper tools for cooking.
Beer Can Chicken Ingredients List
My gluten-free beer can chicken requires only a handful of simple ingredients:
- 1 whole chicken (make sure to remove the bag with the extra parts before cooking).
- ¼ cup water or stock
- 2 tablespoons olive oil
- 1 teaspoon kosher salt
- ½ teaspoon black pepper

Ingredient Substitutions
Since the ingredients list is minimal, there is not much to substitute but you could swap the olive oil for coconut oil, avocado oil, ghee or clarified butter.
Additional Ingredients
The beer can chicken loves more spice on the skin. You can also add whatever you love on chicken including your favorite spice rub, I’m sure it will taste great!
- Spices: Try chili powder, smoked paprika, garlic powder, onion powder, ground cumin, ground mustard seed, or cayenne pepper.
Note: The spices are not part of the original recipe and thus not accounted for in its nutrition calculations. Use them to boost the grilled beer can chicken’s flavors.
Cooking Tools
You need the following tools to make beer can chicken on the grill:
- Vertical chicken roaster
- Rimmed sheet pan
- Kitchen tongs
- Measuring cups and spoons
- Instant-read meat thermometer
Note: Buy a cheap stainless steel Vertical Chicken Roaster off Amazon, Lowe’s, or Home Depot. They have non-stick options, but I’m not exactly sure how hot my grill gets, and we don’t want to exceed the maximum safe temp on the Teflon.
How To Cook Beer Can Chicken On The Grill: Complete Guide
Cooking Method
- Grilling
Preparation Steps
- Preheat your grill on the high setting.
- Rub the entire chicken all over with the olive oil. Sprinkle the salt and pepper over the bird.
- Place on the vertical roaster. Do not add the water or stock to the vertical roaster until it is on the grill- it tends to spill everywhere.
Cooking Instructions
- Place the chicken on the preheated grill and add the stock or water. Close the hood and cook for 15 minutes.
- Check on the chicken. It should be dripping juices onto the roaster, and there should still be plenty of liquid. Add more water if it runs out. Turn the heat down if the chicken is getting black spots. Close the lid and cook for 15 more minutes.
- Check on the chicken. It should now look golden and delicious. Turn the grill to low heat and let cook for 10 more minutes. Check the internal temperature in the chicken’s THIGH (ensure you don’t touch the bone). It should read 165°F (73°C). The juices should be running clear.
- Remove the chicken from the grill onto a rimmed sheet pan. Place the pan on the grill next to the cooked chicken. Using tongs, lift the bird (carefully!) with the roaster still in place and gently lay it onto the sheet pan. The liquid will spill out onto the pan, which is great because you can use that for a sauce or to pour over the chicken once it is cut, for extra juicy meat. Gently remove the roaster from the chicken and set aside to let the chicken rest.
- Cut the chicken however you like and enjoy hot!

Step 1: Coat the chicken with the olive oil, salt and pepper. Slip onto the vertical roaster and add some liquid. You’re ready to grill some chicken.

Step 2: Check the bird at 15 and 30 minutes of grilling. It should be looking golden and delicious. Who needs the beer or the can?

Step 3: Turn the heat down to low and check the temperature. Your grilled beer can chicken should be looking so golden and delicious you’ll want it to jump into your mouth.
💡 My Pro Tip
It is hard to stuff this chicken with aromatics or citrus because it cooks vertically on a cooking stand. Unfortunately, we have to pass on this method for this recipe. However, all hope is not lost! We can add some unpeeled garlic cloves and a bay leaf to the base of the chicken cooker. On mine, the base is a metal pan. This is where I add the water and aromatics. The water evaporates from the heat of the grill, goes inside the cavity of the chicken, and provides some additional layers of flavor while keeping the chicken meat juicy. Skip this tip and stick to cooking the bird on the cooker if your vertical chicken cooker does not have this option.
Also, ensure you measure the hood space on your grill before buying a vertical roaster. The last thing you want to do is come home with your shiny new grill toy and not be able to use it! You have to remember that the chicken will be sitting on top of the roaster, so you’ll need a couple of extra inches. To get the measurement, open your grill’s hood and measure from the tallest point on the hood to the edge. If you have a warming rack on the grill, make sure it won’t interfere with the roaster, or check to ensure that you can remove it easily before cooking.
⏲️ Time-Saving Tips
- Let the chicken come to room temperature before cooking so that the chicken thighs and legs take a shorter time to cook. Besides a shortened cooking time, you will also have an incredibly moist chicken!
- Season the outside of the bird while it is coming to room temperature. It saves time when you are close to cooking, and the salt and pepper also have a chance to do their magic on the chicken skin.
- Preheat your grill. You must heat a gas grill for about 20 minutes for it to come to an even cooking temperature.
What To Serve With Beer Can Chicken?
My grilled beer can chicken loves to be paired with these delicious side dishes:
- Grilled Asparagus: The simple and elegant recipe highlights the natural flavors of asparagus, making it a go-to option for a quick, healthy, and delicious side dish to the juicy beer can chicken. Grill the asparagus spears alongside the chicken if you have space on the grill.
- Cheesy Brussel Sprouts Casserole: The comforting casserole transforms Brussels sprouts into a cheesy, creamy delight that pairs perfectly with the grilled chicken.
- French Haricots Verts Recipe:The haricots verts’ delicate flavor makes them a simple yet elegant side dish that pairs well with this savory grilled chicken.
- Green Beans and Mushrooms:The flavorful combination of earthy and fresh crisp flavors complement the beer can grilled chicken perfectly.
- Spicy Roasted Cauliflower: This is a fantastic choice if you are looking to add a bit of heat to your hearty beer-can grilled chicken dish.
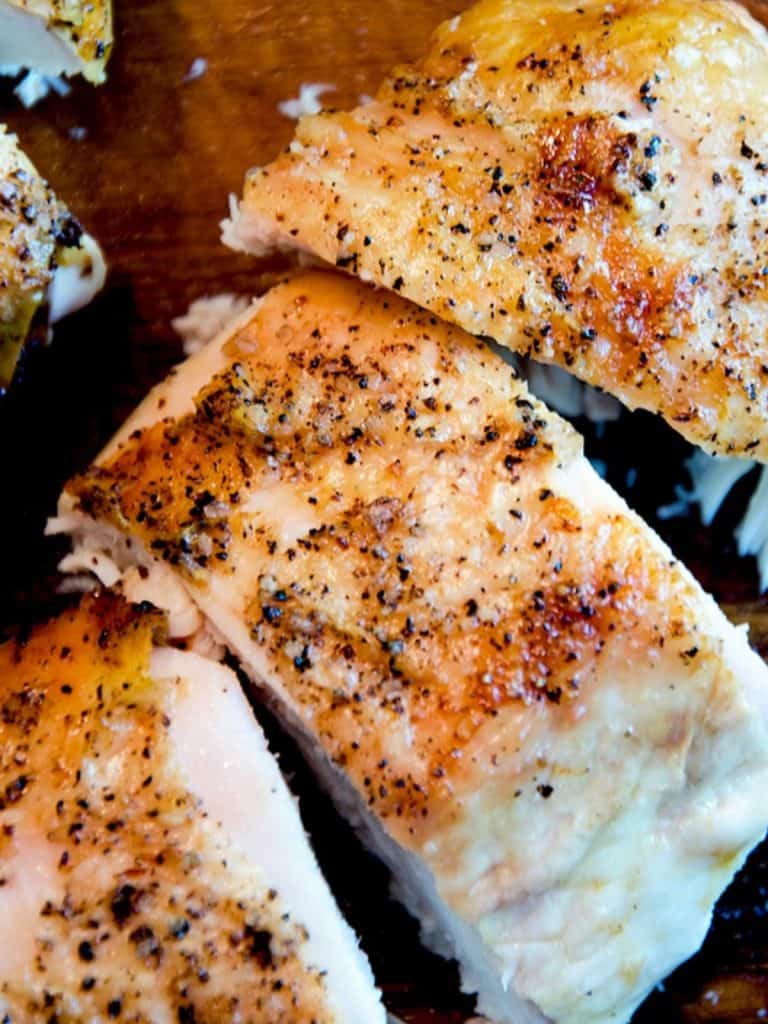
Storage and Reheating Instructions
Storage
- The beer can chicken stores well in an airtight container in the fridge for up to a week.
Freezing
- The recipe freezes well! Freeze it in a freezer-safe container for up to 3 months, defrost it overnight in the fridge, and reheat according to the suggestion below.
Reheating:
- Stovetop: Reheat in a covered pan over medium-high heat with a tablespoon of water for 5-7 minutes or until warmed through.
- Microwave: Reheat at medium heat for 2-3 minutes or until warmed.
- Oven: Reheat it in the oven at 350°F (180°C) for 10-12 minutes.
Conclusion
My Beer Can Chicken recipe has no beer or can, yet it yields tender, juicy and delicious chicken with a crispy skin. With so few ingredients and such little preparation, it is a win for anyone who wants to cook chicken on the grill. It goes well with virtually all side dishes, including my Best Grilled Asparagus, Roasted Brussel Sprouts with Bacon and the delicious Traditional Provencal Ratatouille.
That said, I hope you love this recipe for beer can chicken (without the beer or the can!) as much as I do. Let me know what you think! Please write in the comments any questions or suggestions you may have. Or, find us on Facebook or Instagram. Happy eating.
Try my Grilling Guide For Beginners to learn all my secrets as a professional chef when it comes to grilling!
Other Healthy Chicken Recipes To Try:
Did you love the grilled beer can chicken recipe? Here are other delicious grilled chicken recipes you may love:
FAQs
Many beer can chicken recipes involve cooking a chicken with a half-filled beer can in its cavity. While chicken is gluten-free, the beer may pose an issue as most beers are made with barley, wheat, or rye. You can use a gluten-free beer to cook the chicken if you are on a strict gluten-free diet.
Yes, smoked beer can chicken has a unique smoky flavor. Follow the same procedure but cook it in a smoker at 225-250°F (107-121°C). Use flavored wood chips like hickory, apple, or cherry for delicious smoky chicken flavor.
Yes, charcoal grilling adds a fantastic flavor to the chicken. Prepare the grill for indirect grilling by arranging charcoal on one side and leaving the other side empty. Grill the chicken on the side without charcoal for indirect heat and optimal results.

Beer Can Chicken
Ingredients
- 1 whole chicken make sure to remove the bag with the extra parts before cooking.
- ¼ cup water or stock
- 2 tablespoons olive oil
- 1 teaspoon kosher salt
- ½ teaspoon black pepper
Instructions
- Place the chicken on the preheated grill and add the stock or water. Close the hood and cook for 15 minutes.
- Check on the chicken. It should be dripping juices onto the roaster, and there should still be plenty of liquid. Add more water if it runs out. Turn the heat down if the chicken is getting black spots. Close the lid and cook for 15 more minutes.
- Check on the chicken. It should now look golden and delicious. Turn the grill to low heat and let cook for 10 more minutes. Check the internal temperature in the chicken's THIGH (ensure you don't touch the bone). It should read 165°F (73°C). The juices should be running clear.
- Remove the chicken from the grill onto a rimmed sheet pan. Place the pan on the grill next to the cooked chicken. Using tongs, lift the bird (carefully!) with the roaster still in place and gently lay it onto the sheet pan. The liquid will spill out onto the pan, which is great because you can use that for a sauce or to pour over the chicken once it is cut, for extra juicy meat. Gently remove the roaster from the chicken and set aside to let the chicken rest.
- Cut the chicken however you like and enjoy hot!
Notes
Nutrition
“This website provides approximate nutrition data and information for convenience and as a courtesy only.”
Recent Low Carb Recipes:

Herbs de Provence Marinated Olives Recipe 🫒
My Herbs de Provence Marinated Olives Recipe comes together in just a few minutes using simple, flavorful ingredients. It’s one of those recipes I keep in rotation—perfect for snacks or appetizers when I want something bold without much effort.

Fresh Burrata Caprese Salad
This Fresh Burrata Caprese Salad is one of my go-to summer recipes. Juicy tomatoes, torn basil, and creamy burrata come together with a drizzle of balsamic for a dish that just works. It’s fast, easy, and always a crowd favorite.

The BEST White Asparagus Recipe
This is hands-down the BEST White Asparagus Recipe I’ve ever made. With just a few simple steps, you’ll bring out deep, toasty flavors from this underrated ingredient. It’s crispy at the tips, tender in the center, and ready to serve with just about anything grilled.
Is it low carb? Learn more about it:

Understanding Carbs In Guacamole: Low Carb or Keto?
Delve into the world of guacamole and its carb content—essential knowledge for low carb and keto enthusiasts. Avocado’s creamy texture

What is Low Carb Diet? Carb Confusion Conquered!
Ever wondered what a Low Carb Diet really entails? I’ve broken down the basics to help you understand how reducing

Low Carb Diet for Weight Loss: Does It Actually Work?
Many studies suggest that a low carb diet can indeed be effective for weight loss. By restricting carbohydrates, the body
Sharing is caring!






13 Responses
Great post Scott & right on with the whole can not belonging anywhere near the heat & your food!!
Hi Tez-
I don’t think that many people realize what they are doing with the beer can. And it really isn’t common knowledge that they are lined with plastic- everyone thinks it is just aluminum. Hopefully this post will help spread the word!
Thanks for writing and happy eating!
Take care,
Scott
That looks great. I had to laugh at the instruction to remove the giblets. My brother and I were making Thanksgiving dinner for the first time (mom and dad were away) and he forgot to take the bag out!
He also had a fancy brand-new oven which he wasn’t quite sure how to use yet. It kept going on and off and on again. Somehow it turned out to be the best bird ever!
A year in France sounds marvelous (I’m jealous)!
Hi Jodi:
Thanks for writing- and that is a very funny story. I understand why they leave the bag in, but it seems to cause more problems than it solves!
Not sure what was up with that oven- any ideas? Was it one of those combi-ovens that has microwave pulses?
Hope that you are doing well- and happy eating!
Take care,
Scott
Looks terrific. I just love how rustic the one picture is. I made this last night and it was really tasty. Good tips about the beer can. I never thought about that before.
Hi Julie:
So glad to see you liked the chicken. About the beer can… hopefully, this will reach lots of people and they will stop using them next to the food in the oven.
Thank you for taking the time to write.
Have a delicious day in the kitchen!
Scott
Made this beer can chicken again, and it’s always a hit! What type of grilled vegetables would go well with this to round out a backyard barbecue?